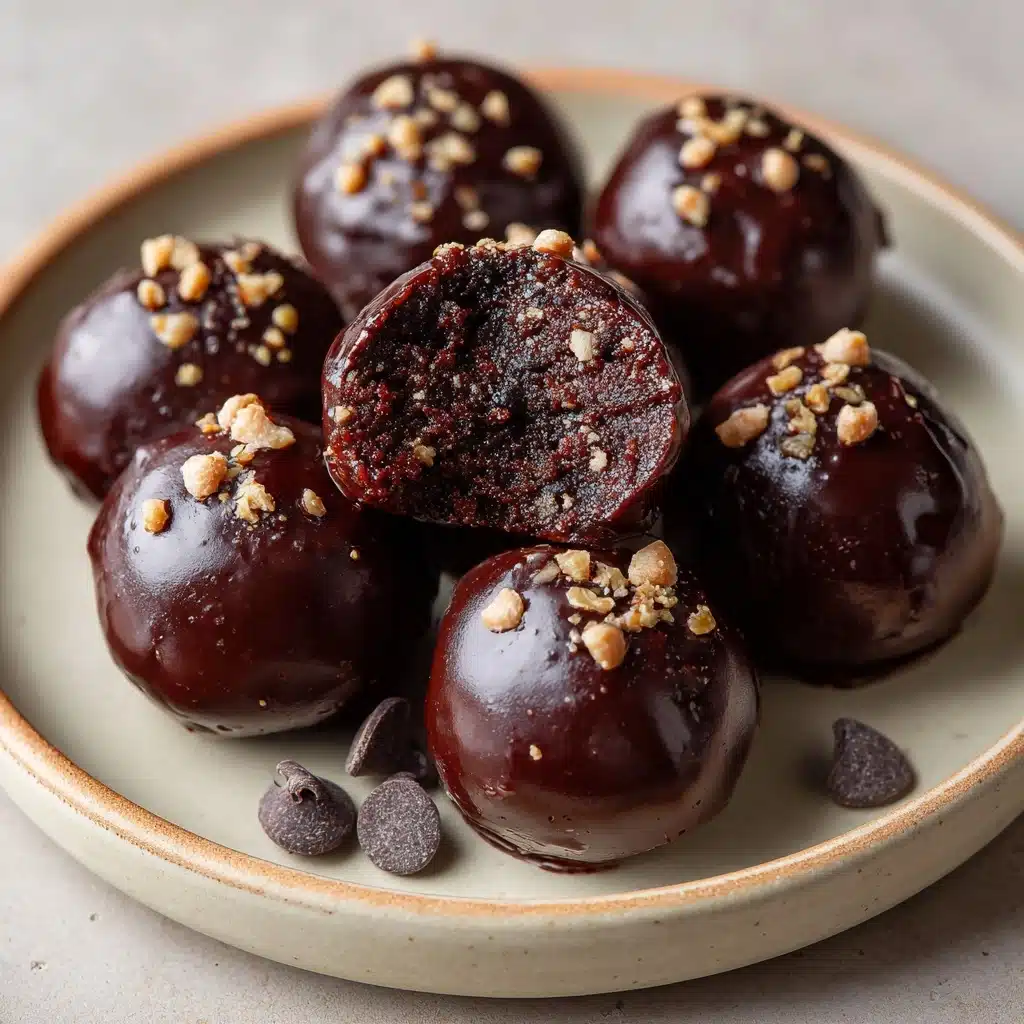
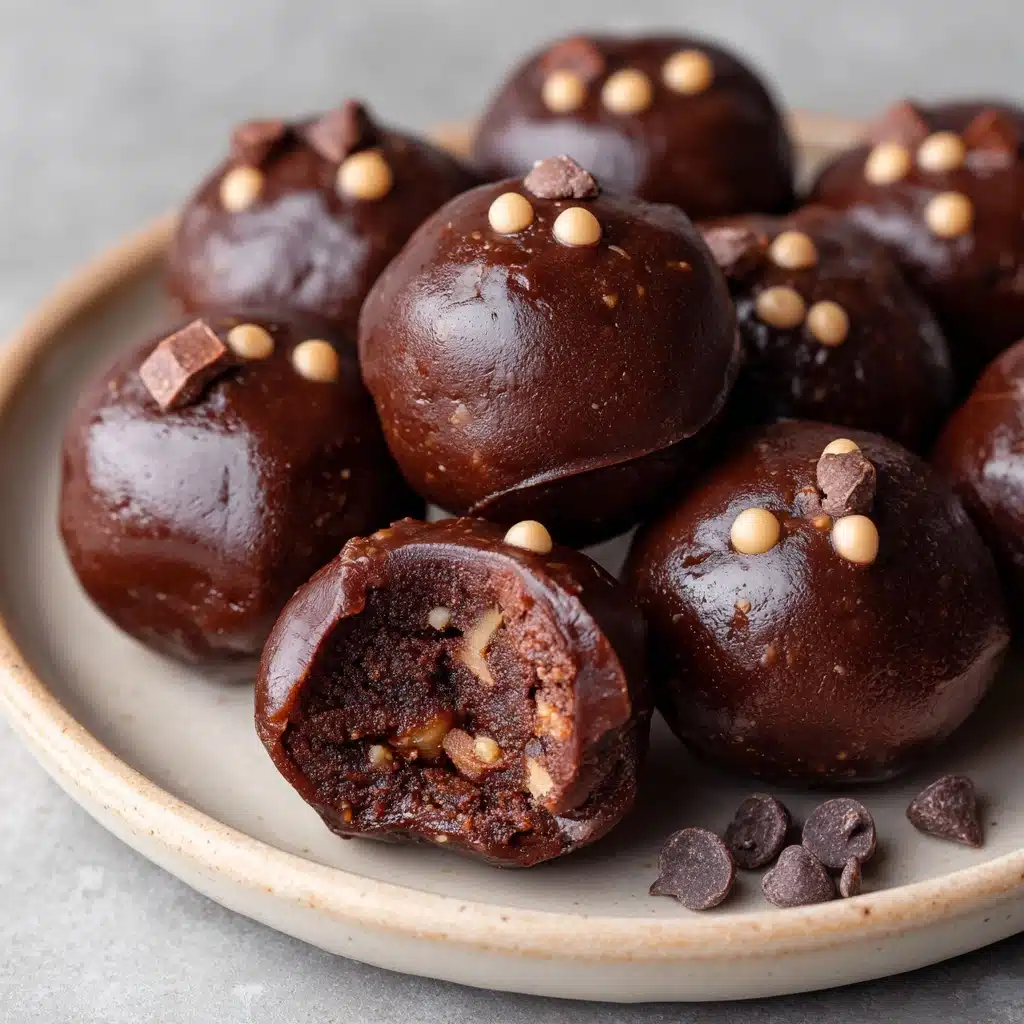
Chocolate Protein Balls Recipe
If you’re looking for the ultimate blend of healthy snacking and chocolatey indulgence, these Chocolate Protein Balls will absolutely delight you! Each bite is loaded with rich cocoa flavor, hints of vanilla, and a satisfying chewy texture thanks to oats and peanut butter. They’re quick to throw together, require zero baking, and are the perfect pick-me-up whether it’s a busy morning, a workout recovery, or just a treat-yourself moment. This is the kind of recipe you’ll want on repeat all week long—healthy, filling, and simply irresistible!
Ingredients You’ll Need
-
Dry Ingredients:
- 1 cup rolled oats
- 1/2 cup chocolate protein powder
- 1/4 cup unsweetened cocoa powder
- 2 tablespoons chia seeds
Wet Ingredients:
- 1/2 cup natural peanut butter
- 1/3 cup honey or maple syrup
- 1 teaspoon vanilla extract
- 2–4 tablespoons milk of choice as needed
Additional:
- 1/4 cup mini dark chocolate chips
How to Make Chocolate Protein Balls
Step 1: Mix The Dry Ingredients
Start by grabbing your largest mixing bowl—this makes it much easier to stir everything together without making a mess. Add the rolled oats, chocolate protein powder, unsweetened cocoa powder, and chia seeds. Use a spatula or wooden spoon to gently toss everything and ensure it’s all evenly distributed and lump-free. This step lays the flavor foundation and helps prevent any pockets of dry ingredients in your final mix.
Step 2: Add The Wet Ingredients
Now it’s time for creamy peanut butter, honey or maple syrup, and vanilla extract to join the party. Drop them right into the center of your bowl. Stir thoroughly, folding the wet into the dry until the mixtures start to come together. Don’t worry if it looks crumbly at first—the next step brings everything together beautifully!
Step 3: Adjust Consistency
Gradually pour in your milk of choice, one tablespoon at a time. The goal is to moisten the mixture just enough for it to stick together when pressed, but not so much that it becomes sticky or gooey. You might not need all the milk, so keep a close eye and mix as you go. Test occasionally by pressing a little dough between your fingers—it should hold its shape nicely.
Step 4: Fold In Chocolate Chips
Once your base is perfectly combined, gently stir in the mini dark chocolate chips. This is the magical touch that adds bursts of chocolate flavor throughout each bite. Mixing them in last keeps their shape and ensures they’re evenly spread in every ball.
Step 5: Shape Into Balls
Using clean hands or a small cookie scoop, portion out tablespoon-sized amounts of dough and roll each into a 1-inch ball. It’s a hands-on step that feels oddly soothing! Arrange the finished balls on a parchment-lined baking sheet for easy handling and no stickiness.
Step 6: Chill and Enjoy
Pop your tray in the refrigerator for at least 30 minutes—this is key to helping the Chocolate Protein Balls set so they become extra fudgy and firm. Once chilled, they’re ready to enjoy right away, or move them to an airtight container for easy snacking throughout the week.
How to Serve Chocolate Protein Balls
Garnishes
Give your Chocolate Protein Balls that bakery-fresh look by rolling them in a little extra cocoa powder, shredded coconut, or finely chopped nuts before chilling. You can even drizzle with a touch of melted dark chocolate for an elegant upgrade—delightfully decadent and great for gifting!
Side Dishes
Pair a couple of Chocolate Protein Balls with creamy Greek yogurt, sliced fresh fruit, or a smoothie for a complete grab-and-go breakfast. For a lighter afternoon snack, enjoy them with a cup of tea or coffee for that irresistible café vibe at home.
Creative Ways to Present
For parties and potlucks, pile your Chocolate Protein Balls on a cake stand or layer them in a glass jar with parchment in between. For meal prep, portion them into little bags or containers for handy lunchbox or gym bag snacks. You can even stick a festive toothpick in each for easy sharing at gatherings!
Make Ahead and Storage
Storing Leftovers
Your Chocolate Protein Balls keep beautifully! Store them in an airtight container in the refrigerator for up to one week. They’ll maintain their texture, stay nice and chewy, and are ready to grab whenever cravings hit.
Freezing
Planning ahead? Just pop the chilled balls into a freezer-safe bag or container and freeze for up to 3 months. To prevent sticking, arrange them in a single layer with parchment between the layers. Thaw for 10-15 minutes at room temperature or a few hours in the fridge for lunch box magic.
Reheating
There’s actually no need to reheat these Chocolate Protein Balls! If you like them slightly softer, let them sit out at room temperature for a few minutes before eating. For an extra treat, gently warm a ball in the microwave for about five seconds for that melty chocolate chip effect.
FAQs
Can I use a different protein powder?
Absolutely! Any chocolate or even vanilla-flavored protein powder works well here—just make sure you love the taste, as it shines through. Plant-based options such as pea or soy protein are perfect if you want a vegan or dairy-free version.
What if I don’t have chia seeds?
No problem—you can easily swap in ground flaxseed or hemp seeds for a similar nutrition boost and texture. Or simply skip them if you prefer, the balls will still hold together.
How do I make these nut-free?
Swap the peanut butter for sunflower seed butter or another seed butter of your choice. This makes the recipe safe for nut allergies without compromising flavor or creaminess!
Can I make them sweeter?
If you love your snacks on the sweeter side, add an extra drizzle of honey or maple syrup to taste, or stir in a few more chocolate chips. You can also try sweetened protein powder, but be careful not to overdo it.
Are these kid-friendly?
Kids love these Chocolate Protein Balls especially with mini chocolate chips! They’re sweet, chewy, bite-sized, and easy to personalize (try rolling some in sprinkles for fun). Plus, you can sneak in extra nutrition with chia or even a little flaxseed.
Final Thoughts
I can’t wait for you to experience the magic of homemade Chocolate Protein Balls—they’re the snack everybody needs in their fridge! Healthy, delightfully chocolatey, and ready in minutes, they’re perfect for busy lives and ravenous snackers alike. Whip up a batch and see just how quickly they disappear!
Print
Chocolate Protein Balls Recipe
- Total Time: 15 minutes
- Yield: 20 balls 1x
- Diet: Vegetarian
Description
Indulge in these delicious and nutritious Chocolate Protein Balls that are perfect for a quick energy boost or post-workout snack. Packed with protein and flavor, these no-bake treats are easy to make and even easier to enjoy.
Ingredients
Dry Ingredients:
- 1 cup rolled oats
- 1/2 cup chocolate protein powder
- 1/4 cup unsweetened cocoa powder
- 2 tablespoons chia seeds
Wet Ingredients:
- 1/2 cup natural peanut butter
- 1/3 cup honey or maple syrup
- 1 teaspoon vanilla extract
- 2–4 tablespoons milk of choice as needed
Additional:
- 1/4 cup mini dark chocolate chips
Instructions
- Mix Dry Ingredients: In a large mixing bowl, combine the rolled oats, protein powder, cocoa powder, and chia seeds.
- Add Wet Ingredients: Add the peanut butter, honey, and vanilla extract, then stir until the mixture starts to come together.
- Adjust Consistency: Gradually add milk, 1 tablespoon at a time, until the mixture is moist enough to hold together but not sticky.
- Stir in Chocolate Chips: Stir in the chocolate chips.
- Form Balls: Using clean hands or a small scoop, roll the mixture into 1-inch balls.
- Chill: Place the balls on a lined baking sheet and refrigerate for at least 30 minutes before serving.
- Store: Store in an airtight container in the refrigerator for up to 1 week or freeze for longer storage.
Notes
- For a nut-free version, use sunflower seed butter instead of peanut butter.
- You can also swap chia seeds for ground flaxseed and adjust sweetness by adding more or less honey.
- Prep Time: 15 minutes
- Cook Time: 0 minutes
- Category: Snack
- Method: No-Cook
- Cuisine: American
Nutrition
- Serving Size: 1 ball
- Calories: 110
- Sugar: 6 g
- Sodium: 45 mg
- Fat: 6 g
- Saturated Fat: 2 g
- Unsaturated Fat: 3.5 g
- Trans Fat: 0 g
- Carbohydrates: 12 g
- Fiber: 2 g
- Protein: 5 g
- Cholesterol: 0 mg


